


Restore Catalog
Backups and restore sources
Use Backup Management to upload database backups, link them to repositories, and pick the restore source that Create uses for a new workspace.
Last updated
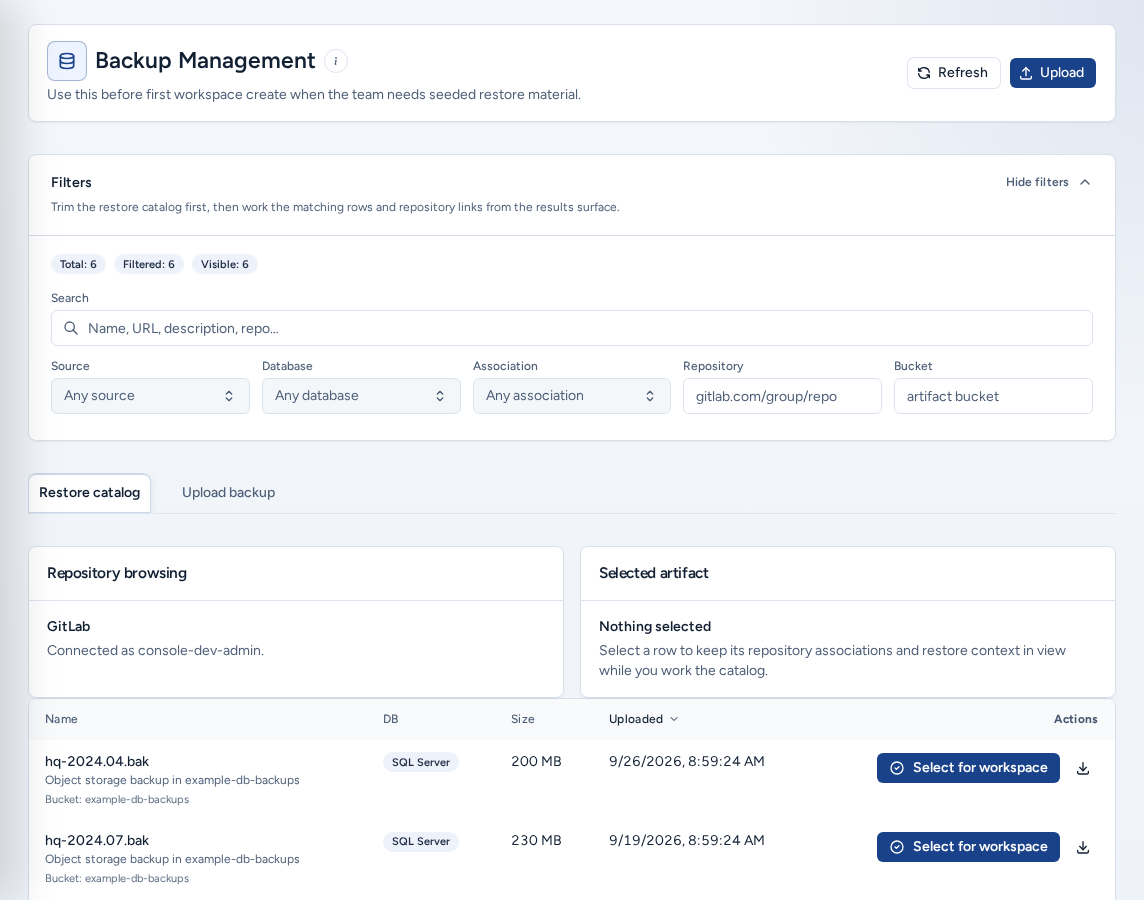
Backup Management (/backups) lists the database backups, WAR files and repository-linked restore files that Create can put into a new workspace. Uploads and repository links decide what Create offers, so storage problems usually show up here first. Open it from Backups under Build in the navigation.
Who can see it
- Everyone with a team can browse the catalog and select a restore source.
- Uploading needs team member access (“Team member access is required to upload backups”).
- Editing, linking and deleting need team admin access (“Team admin access is required to manage backups.”).
- Storage credentials and service tokens are never shown.
Read the page
The header has Refresh and Upload. Workspace restore selected appears next to the title when a restore source is chosen for Create. The (i) Explain backup management page button links here.
Filters (Show filters / Hide filters) shows Total, Filtered and Visible counts, with Reset once a filter is active:
| Filter | Use it to |
|---|---|
| Search | Match a name, URL, description or repository. |
| Source | Managed upload or Object storage. |
| Database | Oracle or SQL Server. |
| Association | Repository Linked or Not linked. |
| Repository | A repository path such as gitlab.example.com/group/repo. |
| Bucket | One storage bucket. |
The Restore catalog tab lists the results. Sort by Name, DB, Size or Uploaded, and page with Page size, Prev and Next. Selecting a row keeps it in the Selected artifact card.
Upload a managed backup
Managed uploads become restore candidates for new workspaces once the file and its details are saved.
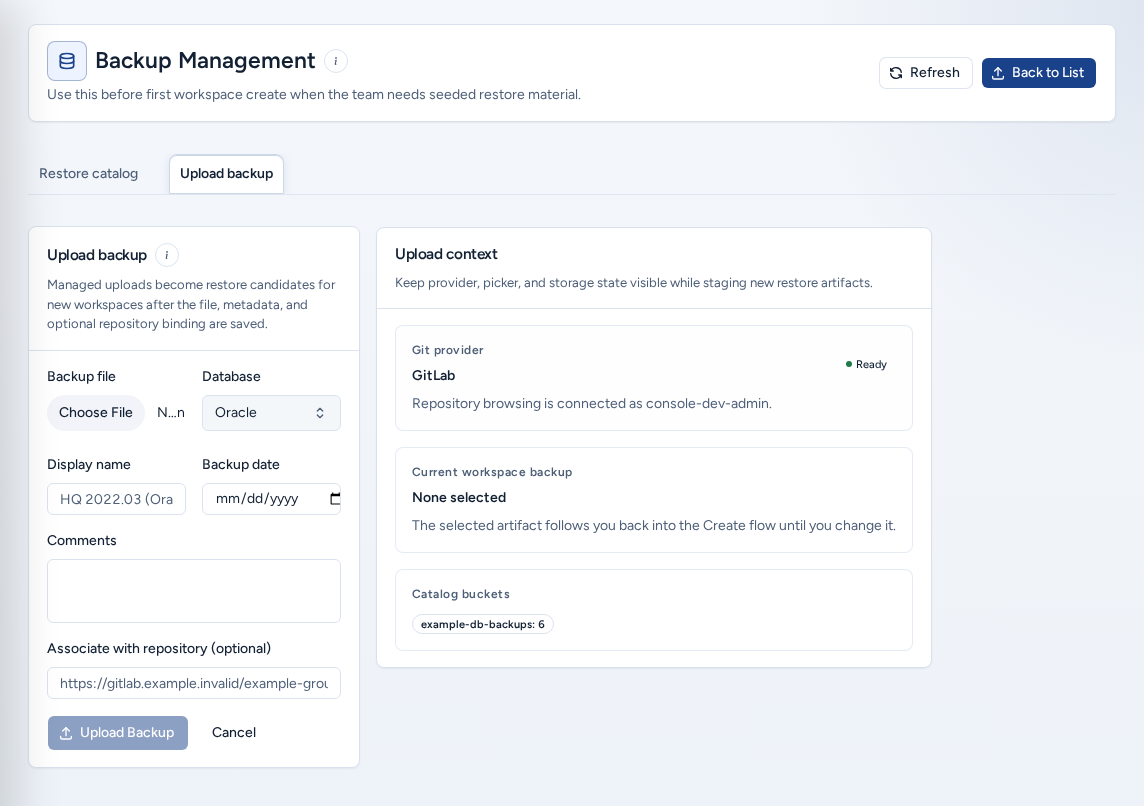
- Choose Upload, or open the Upload Backup tab.
- Choose the Backup file and the Database type (Oracle or SQL Server).
- Enter a clear Display name (for example
HQ 2022.03 (Oracle)) and the Backup date. - Add Comments that tell your team what the backup contains.
- Optional: fill Associate with repository (optional) with a clone URL, so Create recommends this backup for that repository.
- Choose Upload backup. A progress bar shows the upload, then the page returns to the catalog.
The schema defaults to AFM. Change it later with Edit backup.
The Upload context panel shows the Git provider (Ready or Needs auth), the Current workspace backup and the Catalog buckets while you fill in the form. It is information only.
Don’t put credentials or connection strings in names or comments. Your whole team reads them when choosing a restore point.
Choose a restore source for Create
- Find the backup in the Restore catalog.
- Click the row, or choose Select for workspace in its actions.
- The selection follows you back to Create until you change it. Workspace restore selected and Workspace backup show which one is chosen.
When Create is waiting for a restore source (“Create is waiting for you to confirm a restore source.”), the catalog shows backups linked to the repository you are using. If none are linked, it shows the matching database catalog.
Link backups to repositories
- In the row actions, choose Manage associations.
- Current repositories lists the existing links. Remove one with its delete control, then confirm.
- To add a link, choose a Provider (GitLab, GitHub, Bitbucket or Azure DevOps) and pick a repository. If the provider isn’t connected, tick Use custom URL and paste the clone URL, or connect the provider first.
- Set a Priority and, if this is the preferred backup, Default for this repo.
- Choose Add association (or Save association).
Edit, download or delete
- Edit backup: change the Display name, Database, Schema and Description, then Save changes.
- Download: download the file, when your session is allowed to.
- Delete backup: removes it from the catalog after you confirm. First make sure it isn’t the restore source Create is using.
On a phone
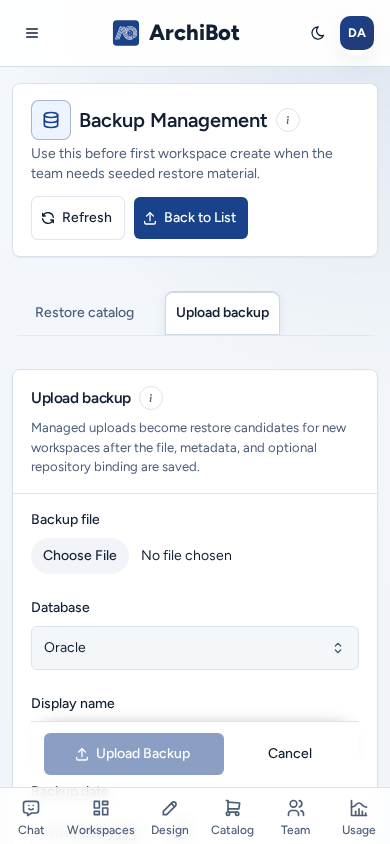
- The page is a single column. The Upload context panel appears after the upload form rather than beside it.
- The Upload Backup button stays pinned to the bottom of the screen while you fill in the upload form.
- Buttons, the file picker and selects have full-size tap targets. Help (i) and the Source select open as sheets or menus that fit the screen.
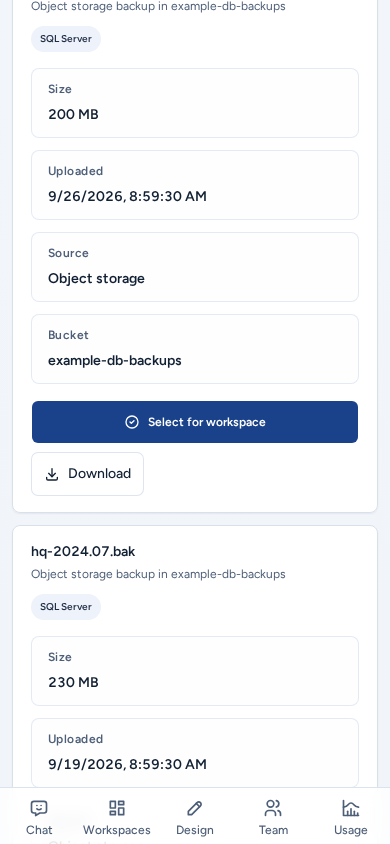
- The restore catalog shows each backup as a card with its size, upload date, source and bucket, and full-width Select for workspace and Download buttons.
Troubleshooting
- Upload is disabled: you need team member access.
- Edit, link or delete is refused: you need team admin access.
- A backup doesn’t appear in Create: check the database type and repository link, and that the Create template needs a backup at all.
- “Backup access is not available for this session.” Sign in again, or ask a team admin.
Related guides
Done When
- Uploaded backups have a clear display name and no credentials in their text.
- Repository links point each backup at the repository Create should prefer.
- The selected restore source is confirmed before you go back to Create.